Uncategorized
Building a Pantry

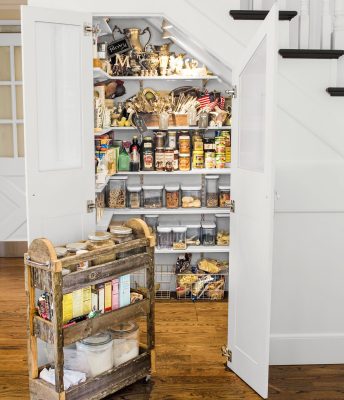
So here at grubandbooze, we have been busy with a little construction project. Building a pantry over the last couple of weeks. Well, phase 1 at least.
Up until now our laundry, washer, and dryer to be precise were in a large cupboard in our kitchen. This wasn’t the best place for it and for a relatively small Californian house took up a lot of valuable storage space.
We decided that what we really needed was a walk-in pantry. Making getting to all of our supplies that much easier. As a result, we had to re-think our laundry area. Just where would we put a washer and dryer?
Six years ago, just after we moved into the house we had a dreaded ‘slab leak’. This is where the copper pipe over time which was embedded in the concrete floors corroded and started to leak up through the concrete into the house. Thousands of dollars later we had repaired the damage, had new floors installed, relocated the hot water tank to the garage and had the whole house re-piped. No small undertaking, I can tell you.
However, fast forward to today and that unfortunate and expensive event gave us the opportunity now to relocate our washer and dryer into the garage as all the utilities, bar the drain, now entered the house through the garage. We had a plumber in who did all the work, including installing a new drain to our main sewer line, it only took them 15 hours. They left at 11 pm! Building out a pantry – phase 1 completed.
Building out a pantry – The next phase
Now we had an empty cupboard which with a little of my DIY skills we could turn into our walk-in pantry. Our house is very much ‘farmhouse’ style inside so we wanted to carry on that feeling inside of our cupboard. That turned out to be quite an expensive decision. We chose brackets made from the black plumber’s pipe. We needed approximately 40 of them to support 5 rows of shelves in the cupboard. Amazon to the rescue, but these things are not cheap, so the brackets set us back $300.
The wood we chose was 12” wide, and 1” thick white pine ensuring it created enough shelving for all our groceries.

That totaled around $150, after nearly making a costly mistake with oak which would have been around $600!! Thank you, woodcutter man, in Home Depot for pointing out that Oak is priced by the foot, not by the board. Beginning to think my wife was right about me having far too much whiskey the night before!
First steps
So first step was to patch the hole in the wall where the plumbers had opened it up to cap off the pipes. Then I found all of the joists behind the wall and marked up the walls ready for the battens to go up anchored into the joists to support the weight of the brackets and shelves using two-inch screws. The brackets weigh 1lb each so just screwing into the walls would not have given enough support for these together with the shelves and groceries on them. Once you find one joist its relatively straight forward as they should all be 16” apart.
Once the battens were installed I set about painting the cupboard. We chose a very light shade of grey to offset the dark stain of the shelves and black brackets.
Next came bracket installation
The brackets were all evenly spaced horizontally and all lined up vertically. This ensured that it all looked pleasing to the eye and symmetrical. There is no point in spending all that money on brackets and then not have them lined up!
The shelves were stained and the back ones installed. The side ones I trimmed the edges to 50 degrees and six inches from the edge. This was so that you didn’t bash your shins or head when you walked into the cupboard. Aesthetically it looks really cool – or I think so at least.
Finally, with the leftover brackets, I made some handles up for the doors so that it all matched.
We are so pleased with the end result! Next up, phase 2 – a new kitchen – time to save some pennies! Building out a pantry was complete
